Description
Most information inside TestBench is stored under Projects. Each Project has a 10 character code and a description so that it can be cross-referenced to another Project or work request control system. You can set up as many Projects as you require, each one with a unique code.
You may attach Notes to a Project with the Notes editor which can be printed out together with the Screens and their Notes by Report_IT.
You can set up Data Rules for a Project so that these will be applied to all Test Cases in the Project, checking these files and data areas automatically. You can also define Project level User Exits for functions to be performed during a Test run. If you use Project level User Exits and Test Case level User Exits, the Project level are carried out first.
The Project is used extensively in TestBench as a way to access data.
This includes:-
• Text Notes to appear in the Test Report document.
• Plan Cases to define an application model.
• Test Cases, used to define how a program is to be executed and tested.
• Data Cases to define selections and logical relationship between files and then extract records into a test database.
• Warp Cases which determine how dates in files should be manipulated in order to create a consistent set of current or future transactions from old data.
• Compare Cases which define files to be compared and rules for the comparison.
• Data Rules to verify file contents after a Test.
• Integrity Cases to verify file contents at any time.
• User Exits to define external programs to be run before, after or during a test to enable additional user defined functions to be performed.
• Action Maps which define tasks to be grouped together and optionally executed as a single unit.
Setting up a Project in TestBench
- Chose a Project code with a maximum of 10 characters (letters and/or numbers excluding apostrophes). If you have other systems using Project codes, it is sensible to adopt the same coding where possible. A Project code in TestBench could be used to represent a smaller unit of work, such as a work request, according to your needs. You may also like to create separate Projects for stages of Testing Eg:-
ORDER_UT Order Entry Unit Testing
ORDER_ST Order Entry System Testing
ORDER_AT Order Entry Acceptance Testing
Test Cases and other data can be copied from one Project to another as required. - Take option 11 from the TestBench Main Menu, then press F6 to create a new Project and enter the new Project code. Enter the Project description (up to 40 characters). On the work with Projects display, if your Project is not shown, press F5 to refresh the list, and if the display is full, roll up or page up/down to view Project codes that may be further down the list.
- Begin to set up any Project Notes with option 9 that you want to record to define the scope, background or general requirements of the Project. These Notes can be added to at any time and will appear on the printed Specification produced by Report_IT.
- From a Project, Test Cases, Data Cases, Warp Cases, Compare Cases, Plan Cases, Data Rules, User Exits, Integrity Cases and Action Maps can be accessed by selecting those options.
- If there is other information already in existing projects, such as Data Rules or User Exits, you can go into this information and copy it to the new Project.
- When using TestDrive, the list of Projects is not refreshed until the connection to the database is refreshed, so you may need to re-connect to see your new Project.
Work with Projects – Details
If TestBench security is switched on, only those Projects to which the user has some degree of authority will be displayed.
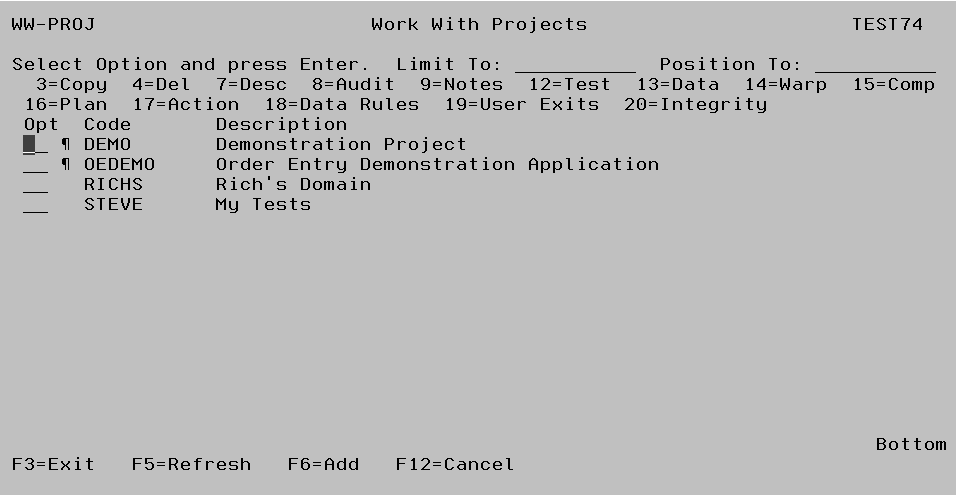
Limit To Key a character or characters to subset the display to records that have the same initial key values. Leave blank to have all records available via scrolling (or page up/down). When entering a ‘Limit To’ value, this will always be used for the ‘Position To’ value in the first instance. Once the ‘Limit To’ range has been established on the screen a ‘Position To’ may also be specified. The last value keyed is stored for each user and will automatically be defaulted into this field when the same panel is next accessed.
Position To This is a volatile field which will position records on the display starting with the characters keyed. Hence, this enables you to move quickly to the end of a long list and from there scroll up or down as required. If entered at the same time as the ‘Limit To’ field, ‘Position To’ will be ignored the next time the enter key is pressed. Once the ‘Limit To’ has been established, ‘Position To’ can also be keyed. If the ‘Position To’ is outside the range of available records, the display will either start or end with the closest records.
Options
3 – Copy
Create a copy of this Project and all associated information such as Test Cases (excluding results) and Notes.
4 – Delete
Key a 4 next to a Project, or a series of Projects and press enter to delete it/them. This will also remove any Test Cases, Data Cases, Warp Cases, Compare Cases and Plan Cases as well as any other information associated with the Project. On taking this option, you will be asked to confirm the delete action before the delete is actioned. Once this option is taken, all the data associated with this Project is deleted from the TestBench database and it cannot be re-covered unless a backup has been taken. There is no ‘un-do’ for this operation.
7 – Desc
Change the Project description.
8 – Audit
This option shows the details of all amendments carried out to the Project.
9 – Notes
This accesses the Notes editor for text associated with the Project. There is additional text that can be entered against a Script or a Screen which is accessed from the Work with Scripts and Work with Screen displays respectively. See the separate section for additional instructions on using the Notes editor. If there are Notes set up against a Project the Work With Projects display shows a ‘¶’ to the left of the Project code.
12 – Test
Links to the Work With Test Cases function to define which programs are to be tested, and the environment for the testing.
13 – Data
Links to the Work With Data Cases function to define files from which records are to be selected and how other files are related to these selected files in order to create a set of test files.
14 – Warp
Links to the Work With Warp Cases function to define how to alter selected dates in a designated set of files, or how to scramble data to de-personalise it, protecting confidentiality.
15 – Comp
Links to Work With Compare Cases which define how two similar files are to be compared.
16 – Plan
Links to Work With Plan Cases which define application models and help with impact analysis and test and environment creation.
17 – Action
Links to Work With Action Maps which list a set of related tasks to be worked on which can also optionally be executed as a single unit.
18 – Data Rules
Links to Work With Data Rules by Project, where logical Rules can be defined for field values in data objects which TestBench will check for each test run in the Project.
19 – User Exits
Links to the Work With User Exits by Project screen so that standard user defined functions can be set up to run before or after a whole test, and before or after individual Sub-runs in a Test.
20 – Integrity
Links to Work With Integrity Cases which define a set of Rules with which a database must comply.