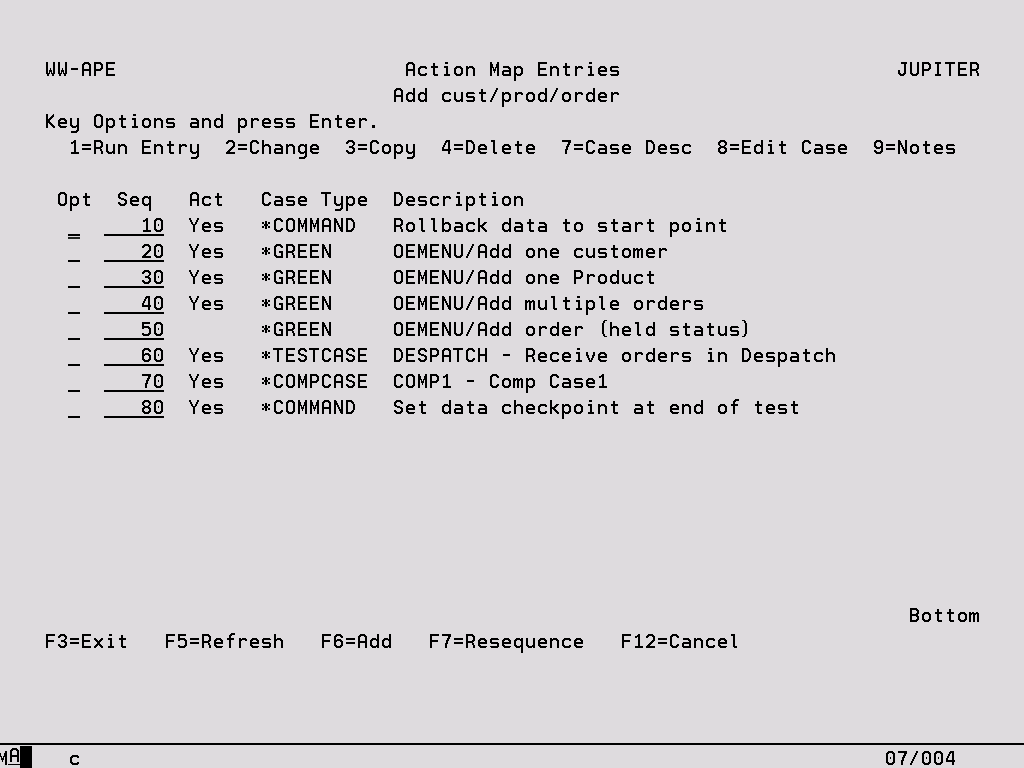
The following panel can be accessed with an option ‘2’ from Work with Action Maps. It lists all of the Cases or commands in the sequence that they will be run as part of the Action Map. For all TestBench or Extractor Cases (Test Cases, Data Cases etc) and Scripts the Case Name is displayed followed by the Case description. For commands the user can key their own description to appear on this screen.
Entries:
1 –Run Entry Execute the individual Case or command. For TestBench or Extractor Cases this is the equivalent of keying an option ‘1’ on the associated Work With panel and the Case Run Initiation screen will be displayed.
2 – Change Edit the Action Map Entry (see specific section below).
3 – Copy Create a duplicate of the entry which will be added with the same sequence number.
4 – Delete Remove the Action Map Entry. A confirmation screen is displayed prior to the deletion occurring.
7 – Case Desc This option displays the description associated with the individual Case which can also be edited here. This option has no effect for commands.
8 – Edit Case This option enables the specific Case to be modified. For example, for a Data Case the Data Case Objects screen will be displayed. This option has no effect for commands.
9 – Notes Edit or view the notes associated with the Case. This is the equivalent of keying an option ‘9’ on the relevant Work With panel. This option has no effect for commands.
Function Keys:
F6 – Add Create a new Action Map Entry (see specific section below). The new Entry will be added with the same sequence number as the Entry where the cursor was positioned on pressing F6.
F7 – Resequence The Action Map Entries will be executed according to the sequence numbers on this display. If the sequence numbers are changed to alter the processing sequence, F7 will place all Entries in the correct order of execution on the display.
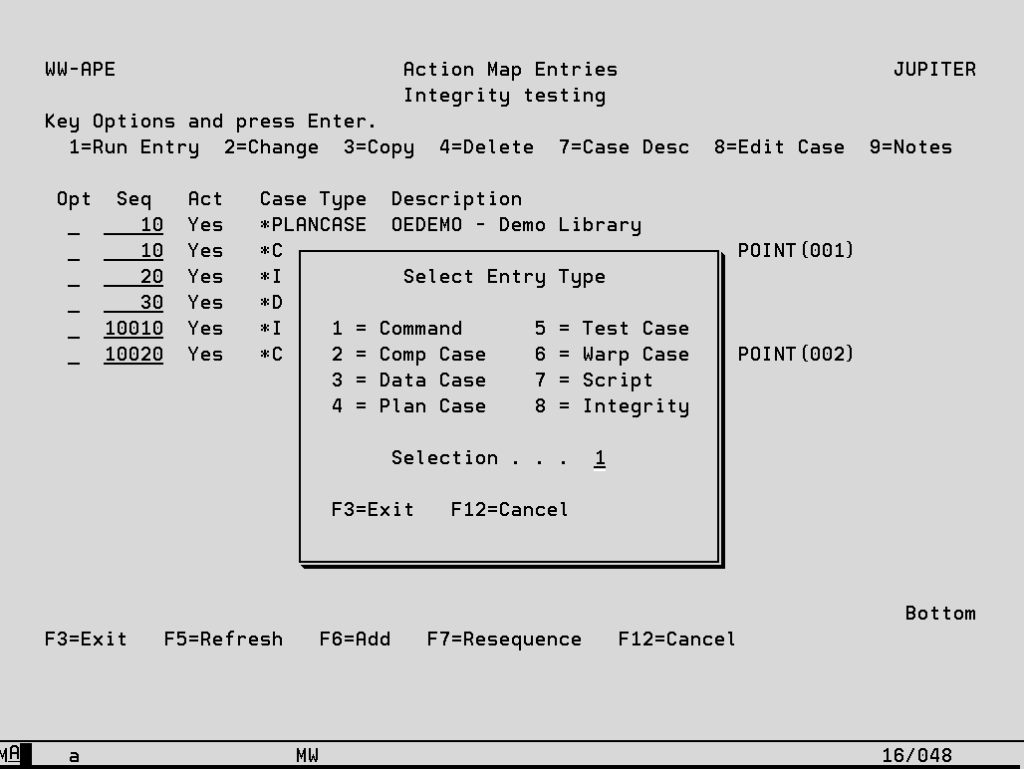
Add/Change Action Map Entry
When a new Action Map Entry is added or modified (F6 or option ‘2’ from Action Map Entries) the following screen is displayed. The user must select to run either a command, a Script or any of the TestBench Cases listed. There may be other TestBench tasks that need to be performed, for example rolling back test data. These must be added as type ‘1’ and then their associated command (Roll_IT) can be keyed.
Action Entries – Commands
If type ‘1’ was selected on the previous screen a command is being entered to be run as part of the Action Map and the following screen will be displayed. This can be either a TestBench or Extractor command or any other iSeries command.

Active Use this option to inactivate the command without deleting it so that it can be activated again in the future if required.
Description Key in text which describes the command. This text will be displayed on the Action Map Entries display.
Prompt Key an option ‘1’ if the command prompt screen should be displayed when this Action Map Entry is executed.
Command The command that will be executed when the Action Map is run. Use F4 to prompt the command and enter its parameters.
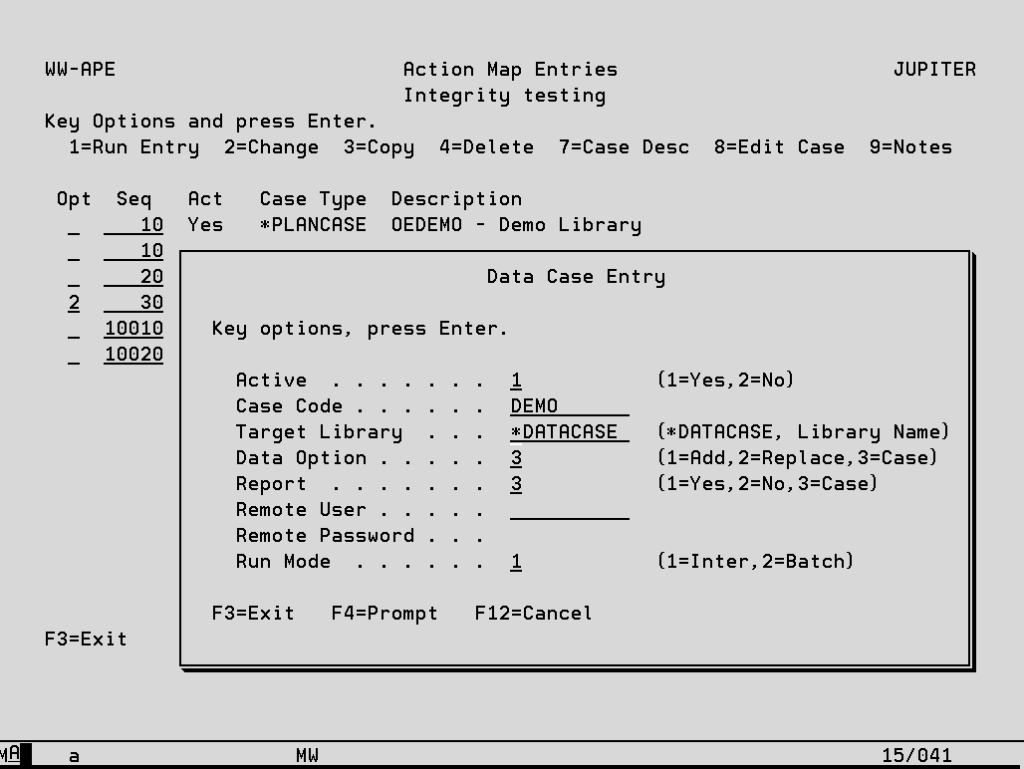
Action Entries – Cases and Scripts
If types ‘2’ to ‘7’ were selected on the previous screen a TestBench or Extractor Case or Script is being entered to be run as part of the Action Map and the prompt screen for the associated command will be displayed.