By default details for the actual Script are shown on the left side and the expected on the right, but the expected details can be moved further to the right using the splitter as often only the actual results are required.
Right click the Script or any of the any of the screens to obtain the following options.
- Convert Actual to Script – Take the Actual set of results and create a new automation Script from them.
- Convert Expected to Script – Take the Expected set of results and create a new automation Script from them.
- Animate – Watch a simulation of the Script playback. This does not require the target application to be active as it is in effect a ‘movie’ of what will happen. Sound can optionally be switched on to provide commentary. See the Script Editor chapter for full details.
- Copy steps to clipboard – Copy the screen and input events to the clipboard, you can then use the Paste from clipboard option to add these to any inline Steps grid in Qualify.
Highlight the Script name and click on the Checks tab to display all quality checks for the entire test. It includes all performance and link checks (whether they have passed or failed) and all mis-spelt words and content check failures, plus any mark-ups and notes. The Checking Rule tab next to it can be used to see which checks were in force at the time of execution.
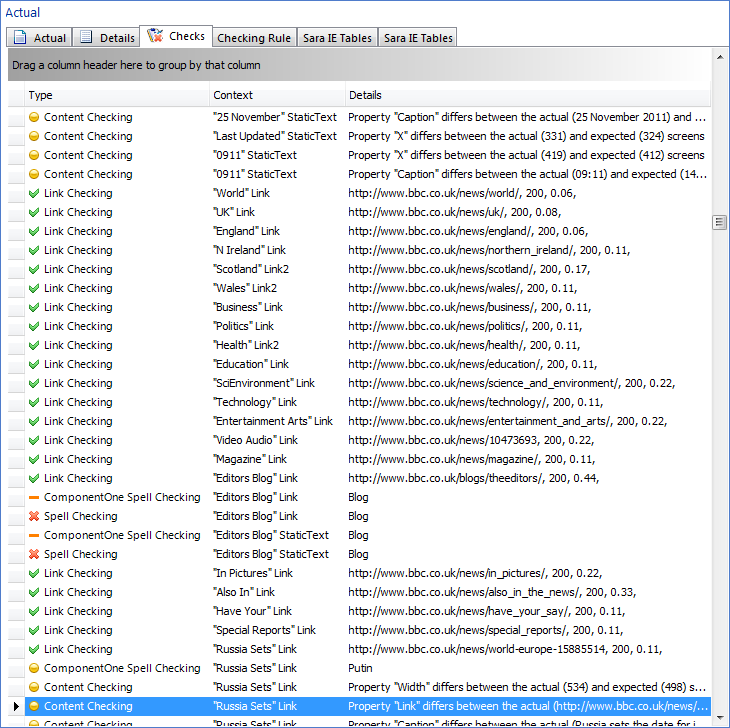
- Type – Either Content, Performance, Link, Spell check, mark-up or note. Each entry contains an icon to indicate the severity:

Success (link and performance checking)

Information

Warning

Error

Critical

An error which has been set to ‘Ignore’
- Context – For a performance check and screen markups and notes this will be the screen in the Script to which the item applies. For all other types this will be the relevant screen element to which the check relates.
- Details – Information to further explain the entry, for example for spell checks it will be the mis-spelt word.
The following right click options are available. Multiple selections can be made although not all options will be available during this scenario.
- View – Display the screen containing this error with the relevant element highlighted.
- Ignore – Use this for elements which have failed but which should not actually cause an error in results in this instance. However it will still be reported as an error for all subsequent tests. If you require an audit trail of changes to the checks, activate the ‘Check Override Prompt’ option which you will find against the Result entity within the Global Application Definition in Qualify Admin. Then when you click Ignore you will be required to provide a Reference and optional Comment in addition to your Qualify password.
- Include – Toggle previously ignored items so that they will be recorded as errors.
- Ignore and Add/Change – For content checks, update the exception details stored against the application, these will be used for all future results. For spell checking add the failed word to the dictionary so that it will not fail in future results. For performance checks change the threshold which is stored against the application, this will be used for all future results.
All quality check results are also available when viewing each screen individually.