The following options are available on all of the screens in the wizard.
Back: Click the arrow icon in the top left of the window. This button is greyed-out below as it is the first screen of the wizard.
Next: This button will navigate to the next screen in the wizard.
Cancel: This button will cancel the wizard.
When the Data Import button is selected the following screen is displayed. Use this screen to select the target location for the data being imported.
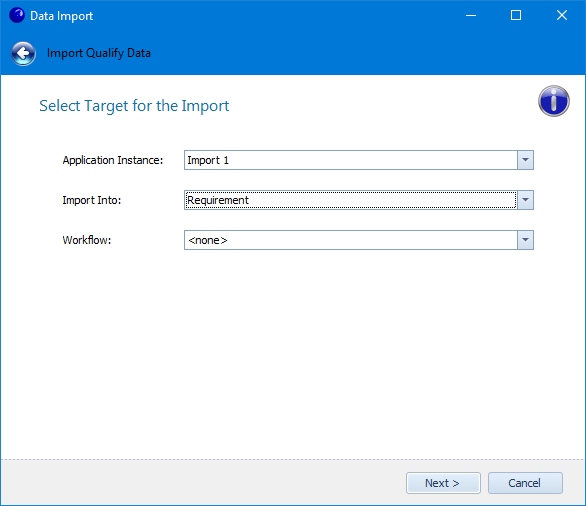
Application Instance: The Instance or Plan within the Application into which data should be imported.
Import Into: Select which Entity type the imported data should be used to create.
Workflow: If the entity you are importing is enrolled in workflow, select the workflow to be used for the import.
Use the next screen to select the spreadsheet to be imported. Once the spreadsheet is selected, an additional window enables the specific sheet to be chosen.
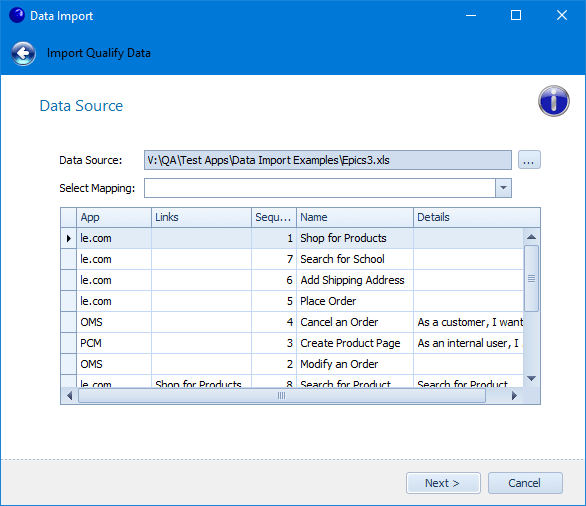
Data Source: Search for the spreadsheet that contains the data to be imported using the browse button. Please note that the spreadsheet must contain the exact data for the import, any non-data rows should first be removed although blank rows will be automatically ignored. You will be given the option to select which sheet to import from if the file contains multiples.
Select Mapping: Choose some settings that have been previously used and saved. If a mapping is chosen some of the following grids will be populated with the relevant settings.
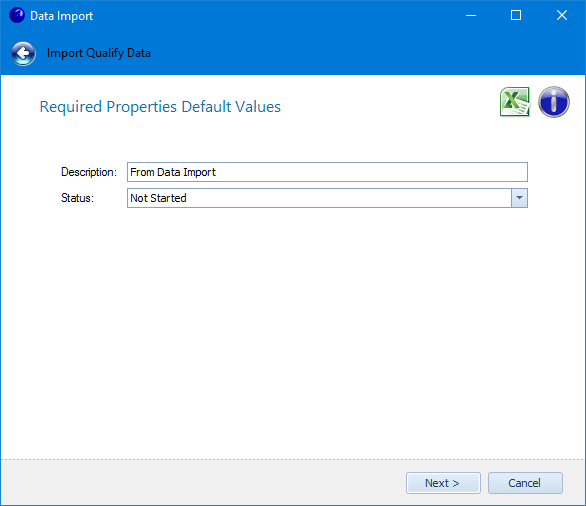
Use this screen to select default data values for any mandatory fields on the entity. These defaults will be used if the mandatory properties are not populated by data from elsewhere in the data import process.
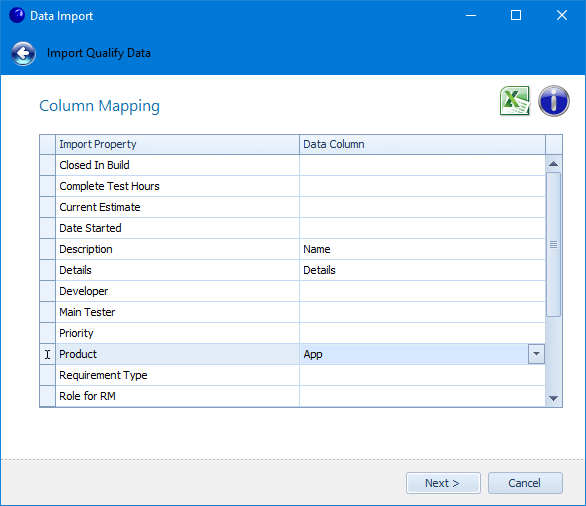
Specify on the next screen how the data being imported should be mapped to the Qualify entity properties. Select which properties the relevant columns will map to within the selected entity, in other words which properties will be populated with which data from the spreadsheet. If any type of pick list property is selected and the value in the spreadsheet does not match one of the valid pick list values, you will be asked on a later screen if you would like them to be added as valid values. Unless this is done the import cannot proceed, although it is possible to lock picklists in the Administration area if you wish to prevent new values from ever being added in this way. Data Import supports most entity property types, with the exception of Milestones and Entity Select properties. Please note that for Multi-value select properties only one value will be imported and for integer properties with a time format, the hours or minutes notation cannot be keyed into the spreadsheet, hence all values will be imported with the default format of ‘minutes’.
Please also note that there is no validation on data values or workflow rules when using the data import function as this is intended for use with large volumes of data. Therefore, either ensure that data in your spreadsheet is accurate before you begin, or use bulk assign or other features to fix any data issues afterwards.
Use the following screen to specify the location within the target instance to import the data into.
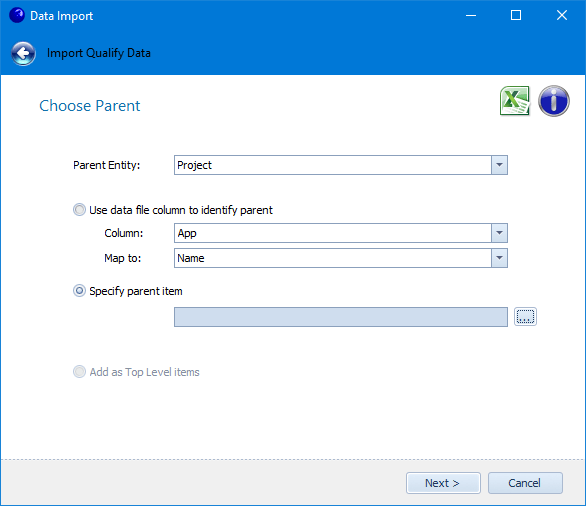
Parent Entity: The name of the parent of the entity being imported, in the above example this would be the Project. If you are importing a hierarchical entity, the entity itself is a valid option.
Use data file column to identify parent: The parent location for each item being imported will be determined by a piece of data in the spreadsheet. For example, if you have already imported some Requirements and are now also importing their associated Tests, each Test will have a property which determines which Requirement they are a child of. By specifying this they can be automatically linked to the correct Requirement.
Column: The name of the column within the spreadsheet which is the identifier for the parent of this item. For example, if importing Tasks, this might be the parent Requirement ID that this Task should be linked to as part of the import. Any rows in the spreadsheet which have blank values for the parent column will be assumed to be top level items.
Parent Property: The existing property of the parent entity containing the data that can be mapped to the Parent Column above.
Specify parent item: Select an existing item within the plan by clicking on the Browse button. For example, if importing Requirements, you may wish to select a parent Requirement for them all to be placed within or perhaps even add to the topmost level of the target instance.
Add as Top Level items: If this is a hierarchical entity which exists at the root level of the application definition, then all items will be imported into this top level.
On the next screen, which will appear for hierarchical data only, specify how the data within the spreadsheet links together.
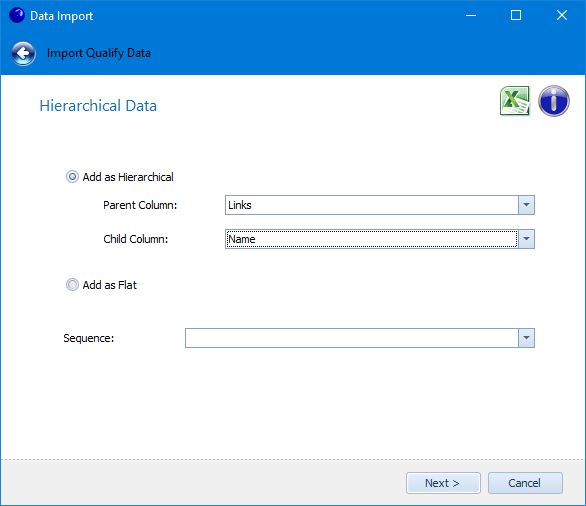
Parent Column: If the entity you are importing into is hierarchical, in other words one can be a child of another, then specify here the column in the spreadsheet which contains the identifier of the parent item. Numeric or text type properties only are allowed.
Child Column: If the entity you are importing into is hierarchical, also specify here the column in the spreadsheet which contains the identifier of the child item (the one being imported). Numeric or text type properties only are allowed.
Add as Flat: If the data within the spreadsheet does not link together, this option enables all rows to be imported to the same level.
Sequence: An optional property which determines the sequence of imported items within their parent. Numeric type properties only are allowed.
If you try to click Next on either of the previous screens and validation errors result in the parent properties for any rows within the spreadsheet not being found, you will be prevented from continuing with the import.
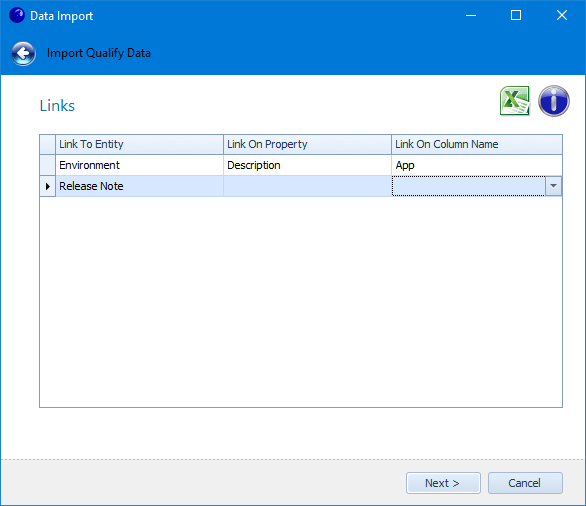
The next screen enables data being imported to be linked to other data already in existence in the plan. Simply specify the two properties which contain matching data.
Once you have specified all of the applicable values on the previous screens, click the Execute button on the next screen. You will be asked whether or not you want to save the parameters entered as a new Mapping, if you do then either key a name into the Mapping property or select an existing one and then click Save. You will also be presented with a message if any pick list values in the spreadsheet do not match one of the valid pick list values, these can be added as valid values during the import. Unless this is done the import cannot proceed, although it is possible to lock picklists in the Administration area if you wish to prevent new values from ever being added in this way. The spreadsheet must then be modified prior to continuing.
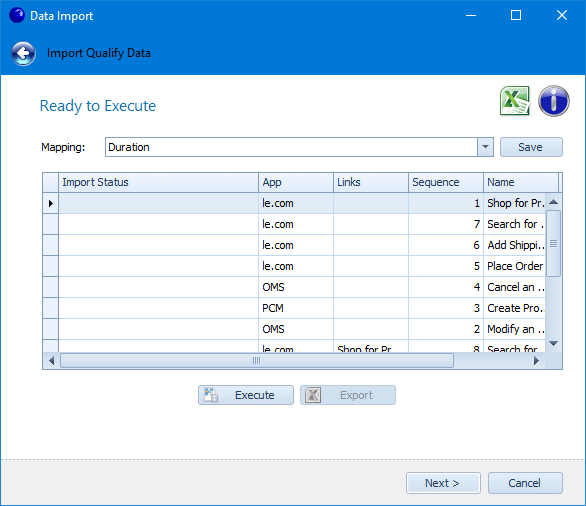
As the data is imported it will be removed from the above grid, therefore following a successful import the grid should be empty. If for any reason any rows cannot be imported, a message will be placed in the ‘Import Status’ column. If this occurs, the remaining data can be stored in a new spreadsheet using the ‘Export’ button, once the data is fixed it can be re-imported.
Once all of the data has been imported, click the Finish button.