When viewing a Script or a set of results, right click anywhere within the screen list or click on the button in the toolbar to access the Animate option. This can be used to view a simulation of the Script playback. When the Play button is clicked on the screen below, the mouse pointer will move around the screen picture and keyboard input will be entered. Optionally switch on the speaker to provide a running commentary which includes reading out any notes that exist against screens and input. This is not intended to be a perfect representation of Script playback but will give an idea as to what will happen when the Script is played and avoids the need to have the test application available and in the correct state.
These animations can be saved and sent to external users who may not have access to the full playback functionality for viewing.

- Play – Begin the simulation from the screen or input which is highlighted in the left hand panel.
- Pause – While the simulation is playing back, click the Pause button to stop the playback, this will be take place once the current action has been completed.
- Open – Open an existing saved animation.
- Save – Save the new or modified animation file.
- Speed – Control how quickly the animation will be played back.
- Speech – If this option is ticked, a narrative will be read out which will include any notes added to the screens or input.
- Enhanced Text – Provide a fuller description of each screen and input.
- Screen Numbering – Show screen numbers in the left hand list.
- View Tab – The animation is shown here.
- Edit Tab – Changes can be made to the animation on this tab.
The following right click options are available.
- Add Bubble – Add a speech bubble which will be displayed as an overlay on the screen during playback. Click on a bubble entry and select the Edit tab to specify bubble text, location, delay and optionally a severity icon. Any markups in the script are automatically converted into bubbles.
- Copy/Paste Options – Copy and paste either a single action, a screen and all its child actions, or the entire screen list and actions.
- Delete – Remove the selected section.
Please note that drag and drop can also be used within the screen list to change the sequence of the actions.
Edit an Animation #
Click on the Edit tab to change some of the properties of the animation. Different options are available depending on which type of item in the left hand panel is in focus.
Click on Title and Credits to display the following options.
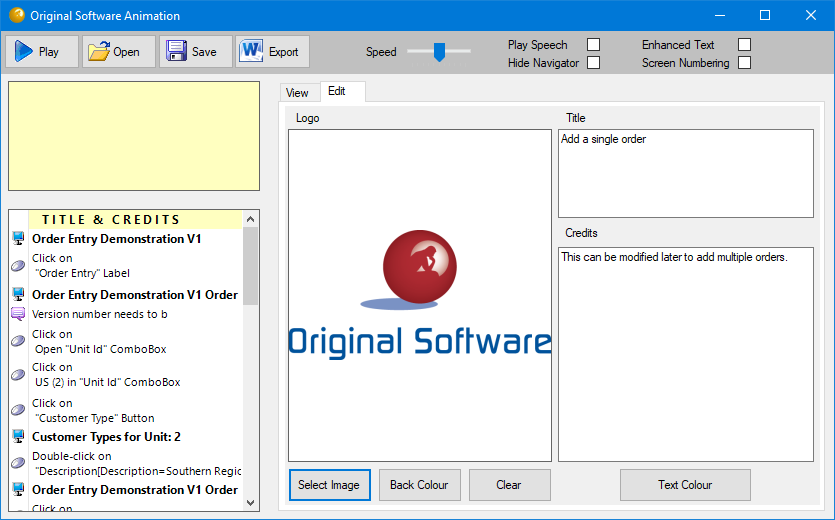
A logo, animation title and description, if entered here, will be displayed at the start of the movie.
- Select Image – Choose an existing image file to be used as the animation logo. Please note that transparent images do not always save correctly and might be given a default background colour on re-loading.
- Back Colour – Change the background colour for the rest of the screen.
- Clear – Remove the logo and background colour so that a new image can be selected.
- Text Colour – Change the colour of the title and description for when it gets displayed as part of the animation.
Click on a screen name in the left hand panel to display the following options.
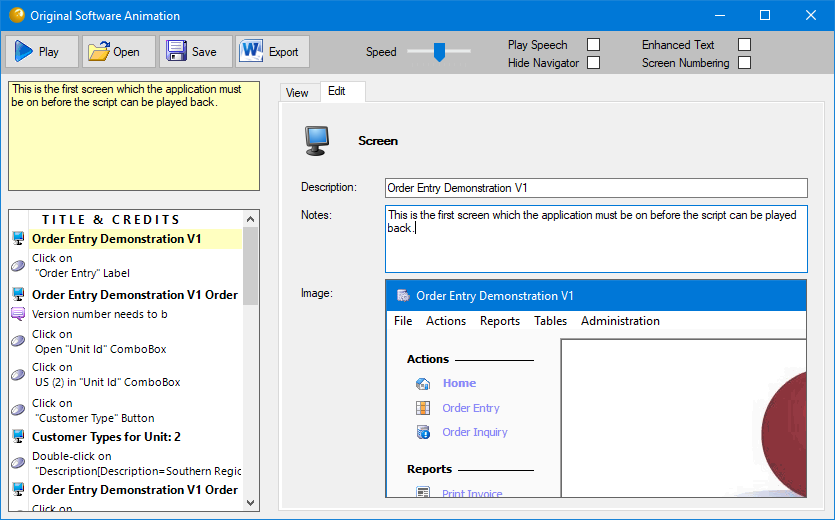
- Description – By default this will be the name of the screen as captured during the recording process, however it can be changed here.
- Notes – If entered these will be displayed in the yellow box in the top left of the display when the animation reaches the chosen screen and read out at that time if speech has been switched on.
- Image – This is displayed in the View tab when the animation reaches the chosen screen but cannot be changed here.
Lick on an input in the left hand panel to display the following options.
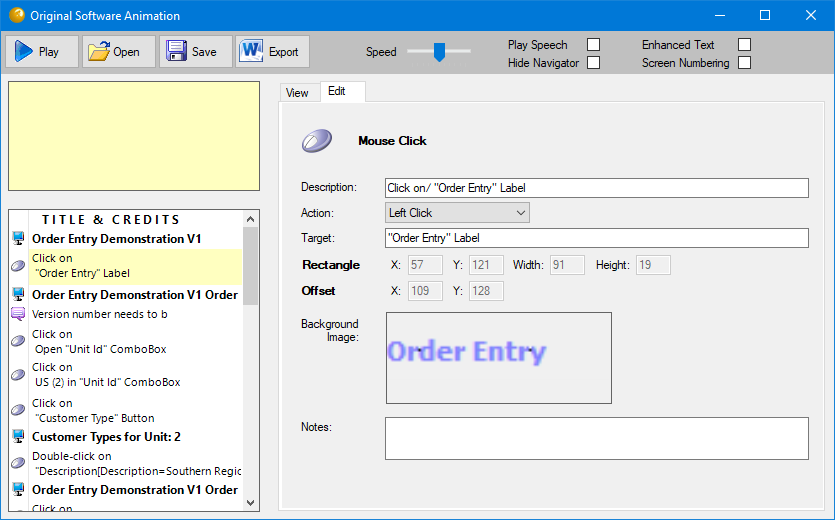
- Description – By default this property is empty. If you choose to key something in and speech is switched on, this will get read out in preference to the ‘Target’ property.
- Action – The type of input being played back, this can be modified here.
- Target – The input details, these can be modified to clarify what the input is actually doing and this will not adversely affect the animation.
- Rectangle/Offset/Background Image – These are for information purposes only and cannot be changed here.
- Notes – If entered these will be displayed in the yellow box in the top left of the display when the animation reaches the chosen input and read out at that time if speech has been switched on.
Save an Animation #
Click the Save button to save the animation along with any changes that you have made. Choose from two types of animation file.
- .osa creates an animation file which can be edited when opened, all Edit panels are still available.
- .oss create a show which contains the view panels only and cannot be edited any further.
Both types of file can be sent to external users who may not have access to the full playback functionality for viewing, provided that the relevant license exists.