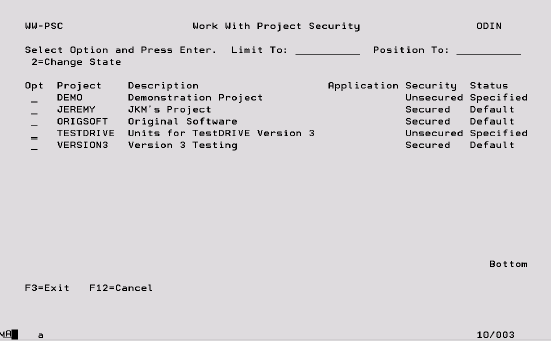
The following screen is accessed with option ‘4’ from the Work with Security menu. All Projects including those that have been added since security was activated will be listed here.
Limit To Key a character or characters to subset the display to records that have the same initial key values. Leave blank to have all records available via scrolling (or page up/down). When entering a ‘Limit To’ value, this will always be used for the ‘Position To’ value in the first instance. Once the ‘Limit To’ range has been established on the screen a ‘Position To’ may also be specified. The last value keyed is stored for each user and will automatically be defaulted into this field when the same panel is next accessed.
Position To This is a volatile field which will position records on the display starting with the characters keyed. Hence, this enables you to move quickly to the end of a long list and from there scroll up or down as required. If entered at the same time as the ‘Limit To’ field, ‘Position To’ will be ignored the next time the enter key is pressed. Once the ‘Limit To’ has been established, ‘Position to can also be keyed. If the ‘Position To’ is outside the range of available records, the display will either start or end with the closest records.
Application Shows whether this Project has been added to an Application. If there is no specific User authority for the Project then the Application authority will be used.
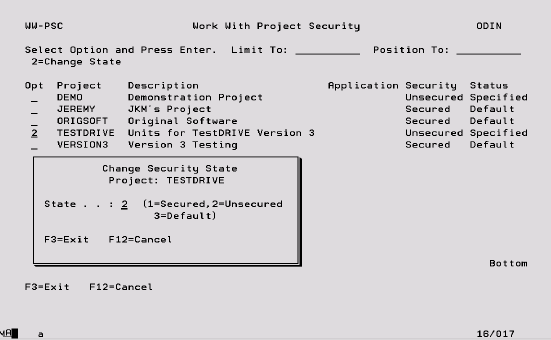
Security There are two valid security values. Secured indicates that the Project is controlled by security and all defined authority rules will be applied every time a User attempts to perform any action to or within the Project. If a Project is unsecured then no authority rules will be applied and all Users have full access to the Project.
Status There are two valid status values. Default indicates that the security setting for this Project (secured or unsecured) remains the same as the default value assigned to the Project when security was activated. If option ‘2’ was selected on the Security Settings panel the default value for all Projects will be Unsecured. If option ‘3’ was selected then the default will be Secured (see previous section for more information). A status of Specified indicates that the security of the Project has been changed from it’s default value using option ‘2’ on this screen.
Options:
2 – Change State This option enables the security of the Project to be changed from Secured to Unsecured or vice versa using the screen shown below.