The following display is accessed with either option ‘18’ from the TestBench Main Menu or option ‘20’ from Work With Projects.
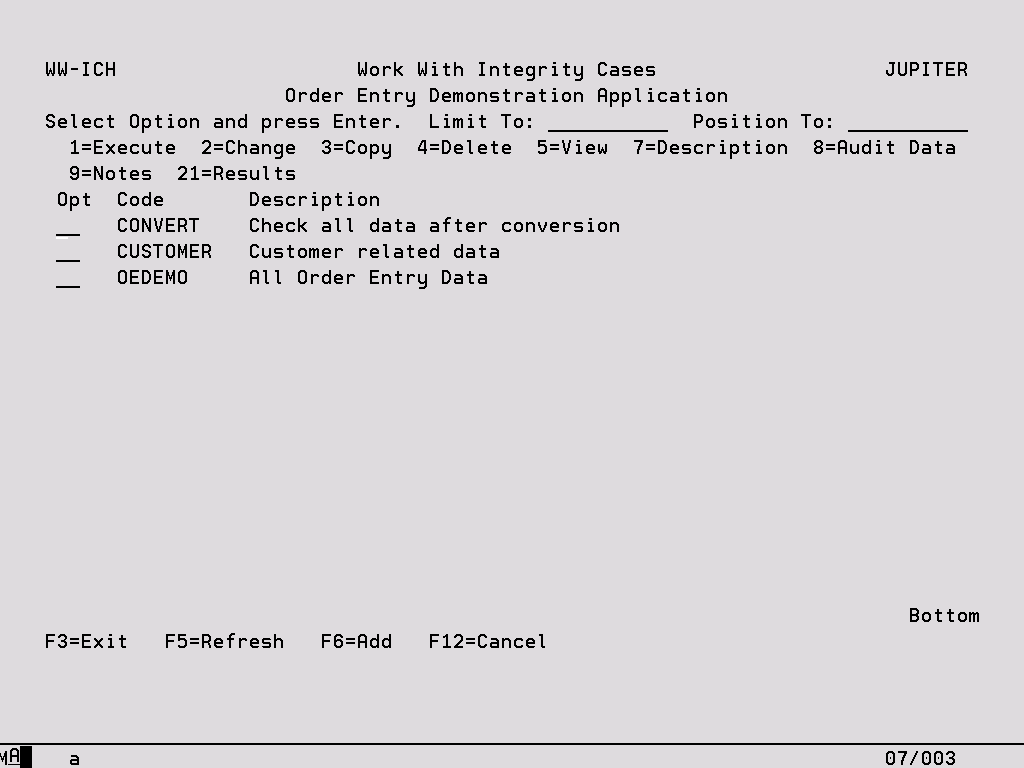
Options:
1 – Execute Start an Integrity Case run, see later section for more information.
2 – Change Access the ‘Available Integrity Rules’ display from where the rules defined within the Integrity Case can be modified.
3 – Copy Copy the selected Integrity Case and all its contents to another Integrity Case and optionally, another Project.
4 – Delete Delete all information associated with an Integrity Case. A warning is displayed before the delete process begins.
5 – View View all of the details of the Integrity Case which can be maintained using options ‘2’ and ‘7’ from the above display.
7 – Description Change the high level Integrity Case options, see later section for more information.
8 – Audit Data Show the details of every occasion on which the Integrity Case was maintained.
9 – Notes Record notes for the Integrity Case. If there are Notes set up against an Integrity Case the display shows a ‘¶’ to the left of the code. There are also notes available for the Project, and for each Integrity Run. The Notes Editor is further described in a later chapter, Notes Editor.
21 – Results Access details of previous Integrity Runs which include all Data Rule failures.
Change an Integrity Case
This facility is used to add or amend the basic details associated with an Integrity Case. You will reach this screen if you choose to add a new Integrity Case or change the description of an existing one. Both of these options are available from Work With Integrity Cases.
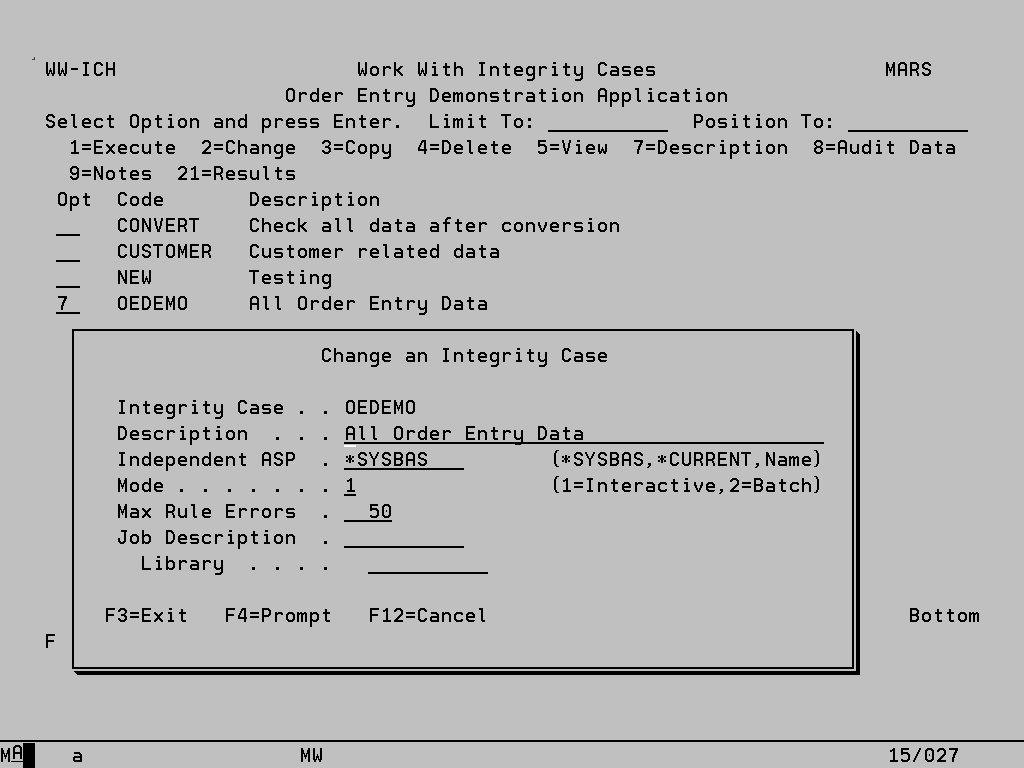
Integrity Case In Add mode you should key an identifier for the Integrity Case which must be unique within the current Project. This field cannot be altered in Change mode.
Description Key appropriate text to describe the current Integrity Case.
Independent ASP If the objects being checked reside on an Independent Auxiliary Storage Pool (IASP) other than the default of *SYSBAS, the name of the IASP can be specified here (or selected using F4). Alternatively select *CURRENT to enable whichever IASP is specified for the current job to be used. The Integrity Case can then contain objects in libraries on the specified IASP and on *SYSBAS.
Mode This controls how the Integrity Case will be executed, ‘1’ for interactive execution or ‘2’ for batch execution.
Max Rule Errors For each Data Rule, checking will stop when this number of records in the file breaks the rule. The default is zero which means there is no limit to the number or errors that will be reported.
Job Description If entered this job description will be used when submitting Integrity Cases to batch.
Available Integrity Rules
Option ‘2’ against an Integrity Case displays the following screen which lists all of the Data Rule that will be executed when the Integrity Case is run.
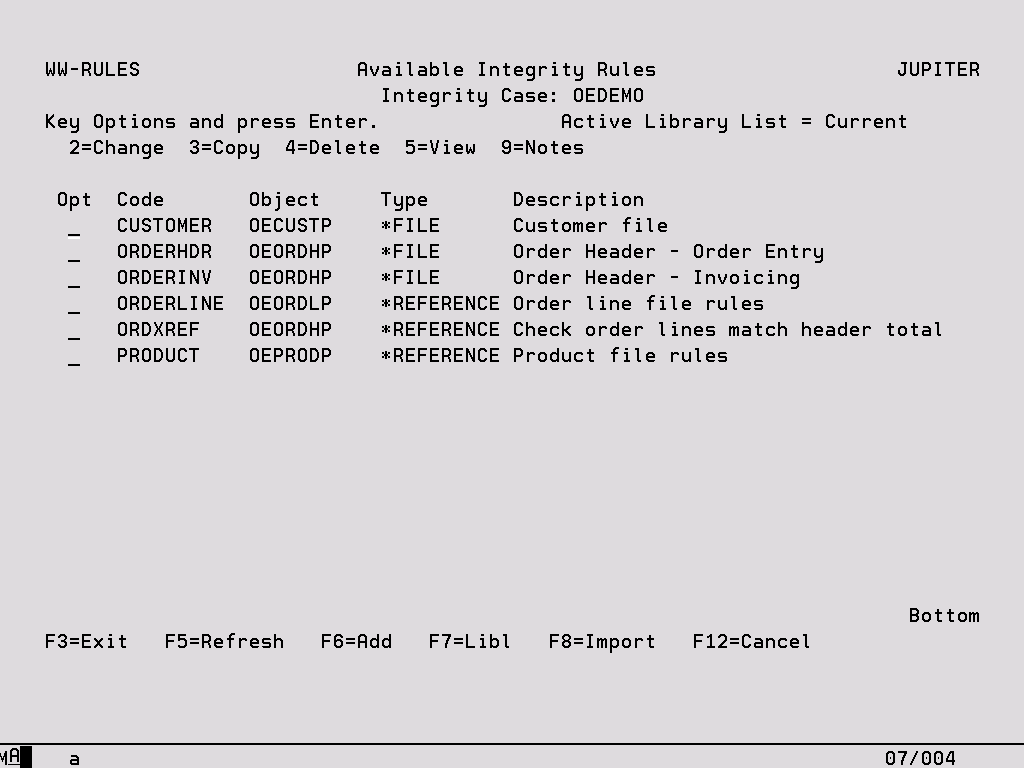
Code The name of the Data Rule as defined by the User.
Object The name of the file over which the rule will be applied.
Type ‘FILE’ indicates that this rule has either been created within or copied into the Integrity Case, whereas ‘REFERENCE’ is simply a pointer to a rule which exists elsewhere in the system. See later section for more information.
Options:
2 – Change Modify the details of the Integrity Rule, see following section for more information.
3 – Copy This option will allow you to copy the selected Rule and all its definition to another rule and optionally another Integrity Case.
4 – Delete This option will delete all information associated with the Rule. A confirmation screen is displayed before the deletion occurs.
5 – View Display all information associated with the Rule.
9 – Notes Record notes for the Rule. If there are Notes set up against a Rule the display shows a ‘¶’ to the left of the code. There are also notes available for the Project, Integrity Case and for each integrity run. The Notes Editor is further described in a later chapter, Notes Editor.
Function Keys:
F5 – Refresh To refresh the display. The description of this function key will be highlighted whenever details of any Rule have been altered.
F6 – Add Allows you to add a new Rule via Integrity Rule Details (see below).
F7 – Libl This is used to define the library list that will be used when the integrity Case is executed in order to locate files which have been defined with *LIBL as their library name. It can be left blank in which case the current Job library list is used. Alternatively files within Integrity Rules can have a specific library name defined.
F8 – Import Use this option to copy Data Rules into the Integrity Case which exist elsewhere in the TestBench product. Alternatively it can also be used to create references to these Data Rules, see later section for more information.
Integrity Rule Details
This screen allows you to define the file for the Integrity Rule and the details of the rule itself. You will reach this screen from the Available Integrity Rules display.
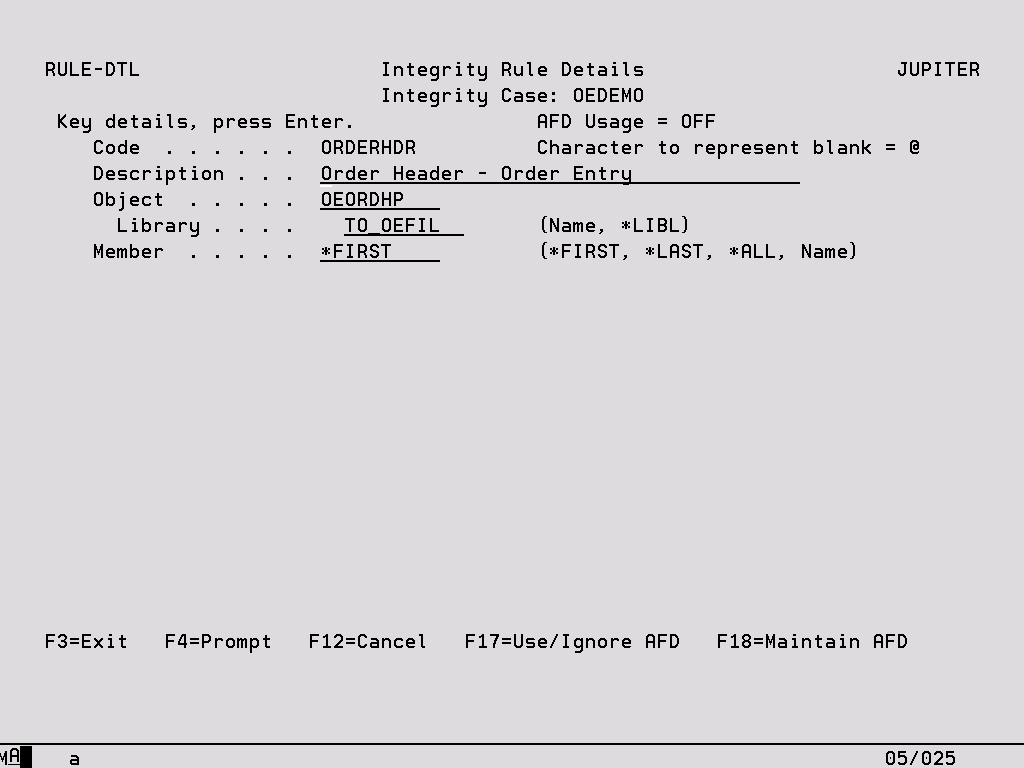
Header Entries:
These entries must be completed and Enter pressed before you will be able to key the WHEN and TEST details.
Code In Add mode you should key an identifier for the Rule which must be unique within the current Project and Integrity Case. This field cannot be altered in Change mode.
Description Key appropriate text to describe the current Integrity Rule.
Object Specify a valid physical file name that will be found in the library.
Library Specify a valid iSeries library name that currently exists, or *LIBL to use either the Integrity Case library list if keyed, or otherwise the current interactive library list.
Member The name of the file member to which the Rule should be applied. Special values of *FIRST, *LAST or *ALL are also allowed.
Function Keys:
F4 – Prompt To show a list of available entries for Object, Library and Member.
F17/F18 – Use/Maintain AFD Press F17 to toggle AFD usage on and off for the file to which the Rule applies. If no AFD exists for the file either in the specified library or for *LIBL, the AFD maintenance program will be called so that one can be created. AFD usage is ON by default for all new Integrity Rules where an appropriate AFD exists.
Press F18 to maintain AFD’s.
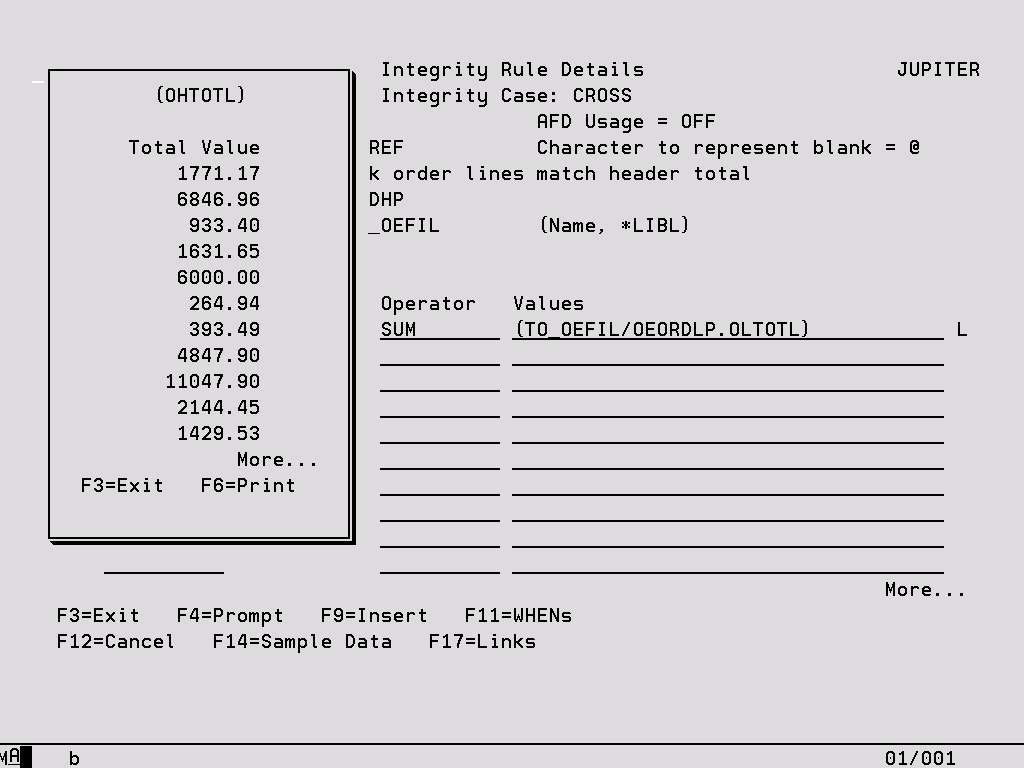
Integrity Rule Details – Fields and Values

WHEN and TEST Entries
The details of a Static Data Rule when comparing a field to a static value comprise two parts; ‘WHEN’ and ‘TEST’. The WHEN part defines the criteria under which records from the file are to be tested. The TEST part defines the criteria that the record must match to satisfy the test. Press F11 to toggle between the two views, the function key is highlighted if any WHEN/TEST entries exist. If any entries are made on a line, then the following validation must be satisfied.
In the case of a cross-file data rule there is a third component, the link between the two files.
Field Specify the name of any field from the current file subject to the field type limitations (refer to Technical Information in the System chapter).
Test Code This must be a valid code that is currently supported for Integrity Rules. Position the cursor on this field and press F4 to see a list of currently supported Test Codes. The test operation codes of COUNT, SUM, MAX, MIN, AVERAGE and EXISTS are only valid for cross-file type data rules.
Value Key the value with which the Field is to be tested in combination with the Test Code. Quotation marks are not required for alphanumeric fields, a sign can be keyed in the first position for numeric fields, and values for Date type fields should be keyed with their separator characters.
If the Test Codes RANGE, NRANGE, LIST or NLIST are entered, the values should be keyed one after the other separated by a blank space. If there is not enough room on one line to key the values then F4 provides an extended display.
Press F4 on this field if the Test Codes ‘DATE’ or ‘TIME’ (valid date or time) have been entered. This will give a list of valid Date or Time formats. Enter the format of the field which is to be tested.
The value field is also used to specify the target file, member and field in a cross-file data rule. This is entered in the following format (including the parenthesis), but a formatted prompt is available on F17.
(library/filename.fieldname)
These values must be valid values. If a separate link has been specified to join the files, an ‘L’ will indicate this to the right of the value field. In the cases of an EXISTS rule, if a link is not separately specified, the link will be created automatically based on the field name in the Field column and the field specified in the (filename.fieldname) value. If the library is omitted, the library list will be used, which means that the object will need to be in the current library list as the rule is created, and the library list at run time will be used when checking.
Function Keys:
F4 – Prompt To show a list of available entries for Fields, Test Codes, and formats if doing valid Date or Time tests. Provides an extended values entry display if required.
F9 – Insert Add a blank line before the one on which the cursor is currently placed. All following entries will be moved down a line.
F11 – Show WHENs/TESTs Change between the WHEN conditions which determine under which conditions the test will take place and the TEST which defines the actual criteria that must be met. This function key is highlighted if any WHEN/TEST entries exist.
F14 – Sample Data To access the Sample Data facility where the actual data from the current file will be shown according to cursor position.
F17 – Links This function key accesses the formatted prompt window for cross file data rules where you can also enter links between the main file and a related file. If a link has been set up already for a line in an Integrity Rule, an ‘L’ is shown to the right of the Value field. See earlier section on defining links.
Sample Data
This facility shows the values of a single selected field in a maximum of the first eighty records. You will reach this screen by pressing F14=Prompt on any of the Field Names in Integrity Rule Details. This can assist in the choice of the correct field or value for the rule.
Importing Data Rules
If Data Rules have been created to check database activity during test execution, you may wish to use these Data Rules in an Integrity Case. Therefore, it is possible to import Data Rules which exist at the Global, Project and Test Case levels into an Integrity Case to become an Integrity Rule. These can either be copied, in which case a new version exists within the Integrity Case which can then be altered without affecting the original Data Rule, or a reference to the original can be created and no changes within the Integrity Case are then possible.
The Import Data Rule screen is reached with an F8 from the Available Integrity Rules display.
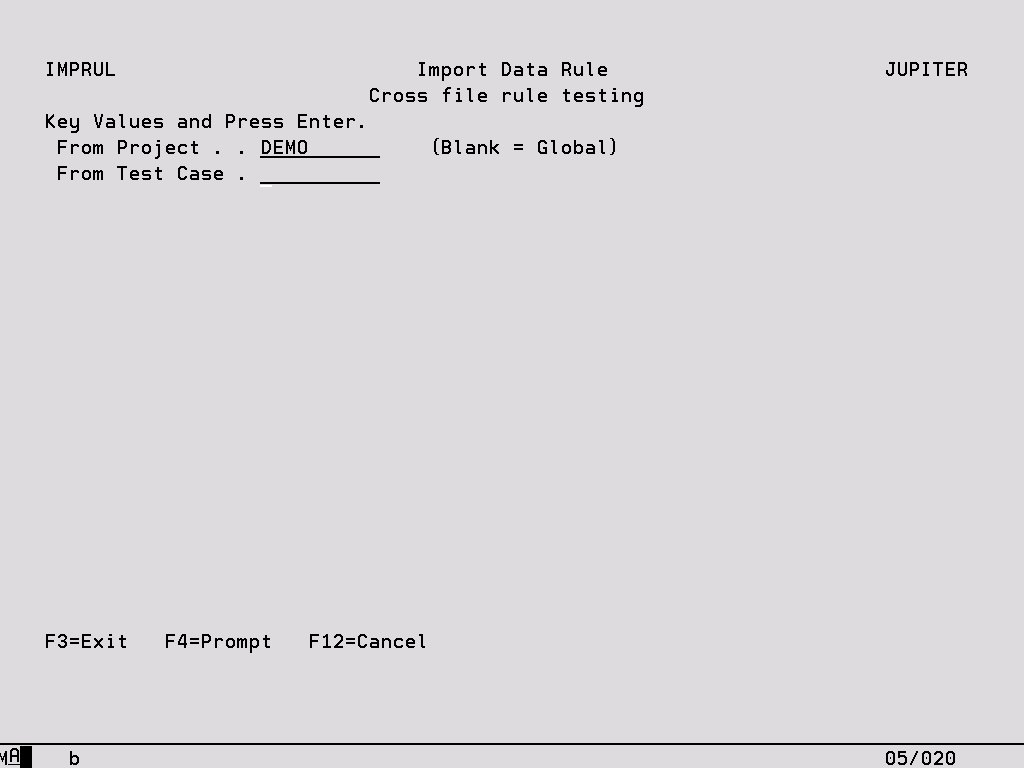
From Project For a Project or a Test Case level Data Rule, key in the name of the Project in which the rule resides. For a Global level Data Rule, leave this field blank.
From Test Case For a Test Case level rule, key in the name of the Test Case in which the rule resides. For Global or Project level Data Rules, leave this field blank.
Press Enter on the above header screen to retrieve a list of Data Rules.
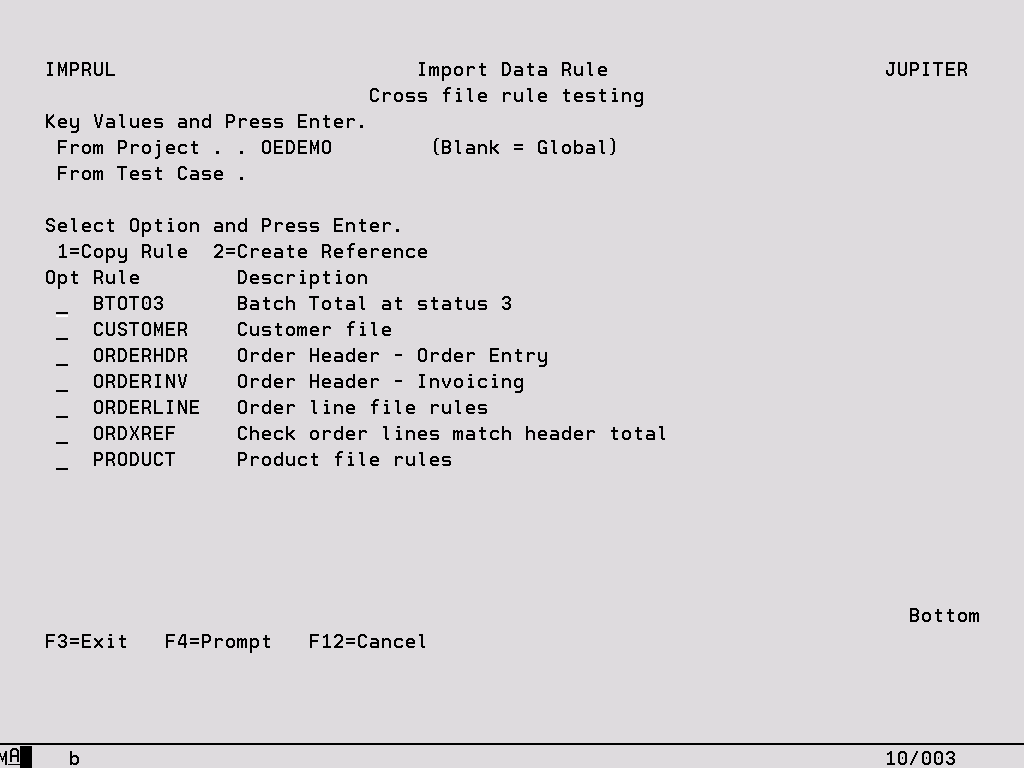
1 – Copy Rule Create a separate copy of the Data Rule within the Integrity Case.
2 – Create Reference Create a pointer to the Data Rule from within the Integrity Case. The rule cannot be changed in the Integrity Case but any changes to the Data Rule will be reflected when the Integrity Case is executed. This option is not allowed for Test Case level Data Rules.