When the Save option is selected, the following window is displayed.

The Playlist results can be reviewed, once you have finished click Save to save the results.
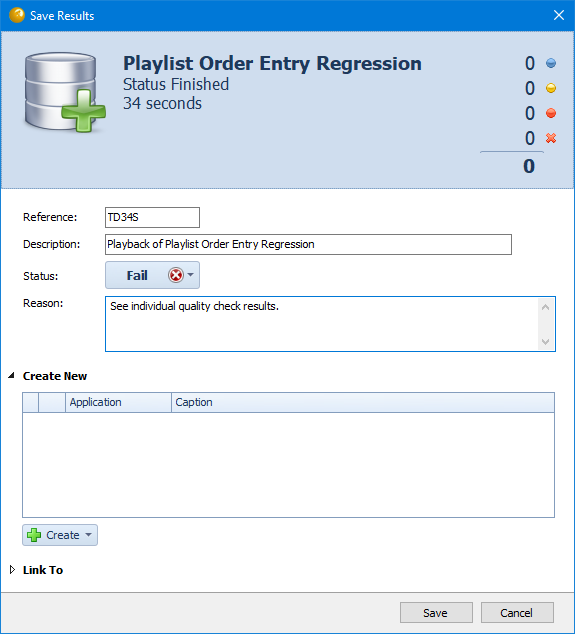
- Reference – Also saved with the results, this text can be used to hold the version number or change control reference for example.
- Description – This text is saved with the results and can be used to describe the nature of the test or the contents of the result set.
- Test result – Use this option to Pass or Fail the test or section of the results you intend to save.
- Comments – Use in conjunction with the status field above to document the reason for passing or failing the test.
- Authenticated – If results have been marked as supporting authentication, the authenticated options will be available here. To mark this set of results as having been authenticated or validated, tick the option and re-key your Qualify password. To authenticate results after they have been saved, click the Pass/Fail Update button on the results summary screen once they have been re-opened. Please note that if an authenticated set of results is subsequently changed and re-saved, they will be automatically de-authenticated and a comment will be added to the Pass/Fail status area.
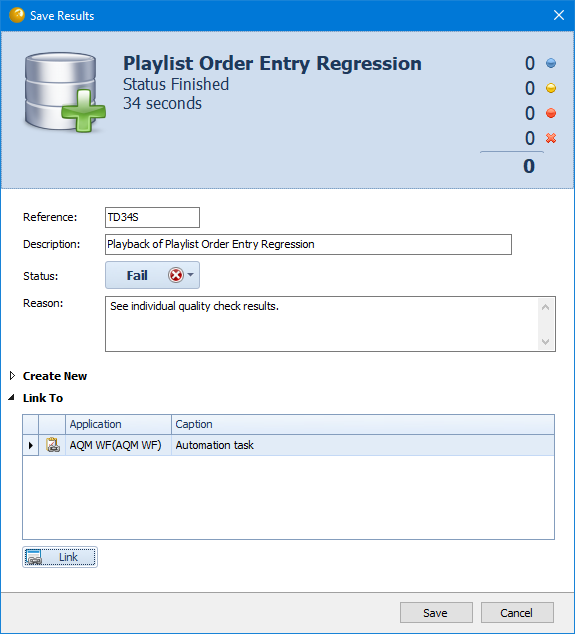
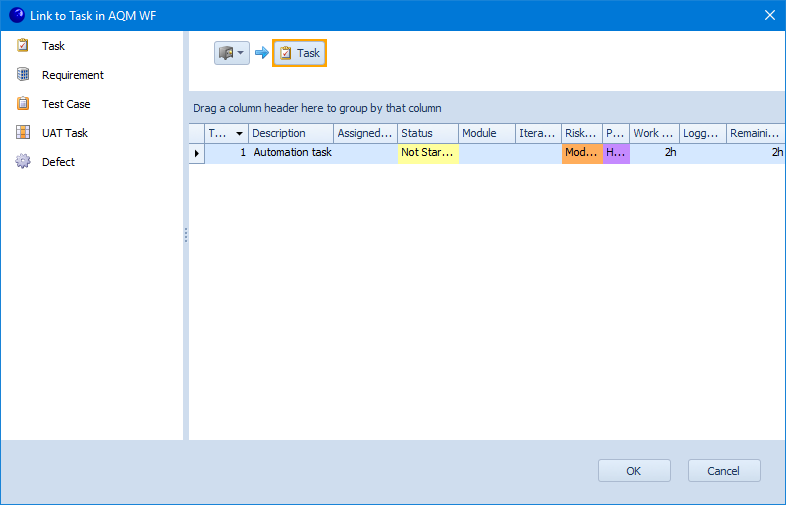
You can either choose to create a new entity such as a Defect against which to attach these results or attach to something which already exists. If creating a new entity, all valid top level entities are listed for you to select the type of item that you wish to create. You must then select either the parent for the new entity or the entity itself against which to attach results from the lower panel. If you are creating a new entity, when the Create button is clicked you will be asked to fill in the entity details.
- Favourites – Items appearing in the above display can be added to the Favourites area using the right click context menu, which is useful as a shortcut when the same locations are accessed regularly. Favourites can then be selected by clicking the green arrow icon to the top left of the display.
- Application Instance – An item can be selected from or saved to not only the current application instance (plan) but also another instance which can be in the same or a different application definition. Click the down arrow on the top left of the panel to make an alternative selection. Only those instances which are valid for the current action are displayed. For example only the instances containing a relationship to Results will be listed.
- Recent Locations – The second drop down in the toolbar lists the locations most recently accessed and can be used as a quick method of gaining access to a specific container.
- Reload – The blue arrow icon will refresh the display so that any newly created icons appear.
- Change the current layout – Toggle between the Tree/List View as shown above, or the Drilldown view which displays data in a grid format enabling more than one property to be displayed at a time.
There is also a right click option within the grid which enables child entities of the selected item to be created. So for example if you wish to add a Defect but a relevant Task does not exist then you can create one here.